Is it still PIZZA if it’s good for you?!

When I’m feeling a little bit tired or sorry for myself, there’s nothing quite as comforting as a hot slice of pizza. I’ve come across so many different recipes in my search for a healthier alternative, from cauliflower pizza (don’t do it…) to a quinoa crust, and nothing ever hit that thin and crispy spot. Then I discovered socca and there’s been no looking back. These little pancakes are so versatile, and it doesn’t just end with pizza, you can use them as wraps, they’re great alongside a bowl of curry or you can even crisp them up in the oven and dip them into some fresh homemade guac. You can season these however you fancy – adding minced garlic to the batter works really well, but cumin is my favourite. I like to keep a little stash in the freezer and after a minute or two in a hot oven they’re good to go. This recipe makes four good sized pizzas for you to enjoy, with extra socca to squirrel away for a rainy day.

Takes 40/Makes 2 of each (with spares)

Ingredients
For the base
250g of gram (chickpea) flour
1 tsp cumin
pinch of salt/pepper
700ml water

For the toppings
Courgette & feta
 2 tbsp of green pesto
1 small courgette
100g of feta or dairy free salad cheese

Sweet pepper and mozzarella
2 tbsp of tomato passata
1/2 a red onion sliced
3 baby bell peppers sliced
125g mozzarella (approx 1 ball)

Method

Preheat your oven to 220 degrees Celcius.

Throw the ingredients for the base into a food processor (you can use a hand blender if you don’t have one) and mix until a smooth batter has formed. Leave the mixture to rest in the fridge for at least 20 minutes. Meanwhile, heat a little coconut oil in a frying pan, until the entire bottom of the pan is covered. (You’re going to fry the socca like pancakes so this step is important.) Pour into the hot pan, about 3 tablespoons of the batter mix, until the bottom of the pan is covered and the socca is about 3mm thick. After two minutes, once the bottom side is cooked. flip the base and aloow the other side of the ‘pancake’ to cook. Keep making pancakes until you run out of batter!

At this point,before I top my socca bases, I like to pop them into the oven to crisp up a little. Once you have done this, spread the base – pesto or passata –  onto your pizzas. Use a vegetable peeler or spiralizer to cut the courgette into strips and layer these onto your pesto bases and sprinkle the chopped onions and peppers onto your tomato bases. Finally top your pesto pizzas with the crumbled feta and the tomato pizzas with chunks of torn mozzarella.

Pop the pizzas on a baking tray into the oven for3 5-10 minutes – cooking time depends on how liberal you are with the toppings, so keep an eye on them! They’re done once the cheese is starting to brown and melt. (Yum)

Carefully remove them from the oven and try your hardest not to devour all four on your own!


Falafel is better with beetroot!

Falafel is a firm favourite in my lunch repertoire. I love how versatile it is, and whether they’re on top of a beautiful green salad, rolled up in a buckwheat tortilla or dipped into some houmous, you literally can’t go wrong with these little babies! This recipe is naturally gluten, wheat and dairy free, plus the addition of beetroot adds a real sweetness to the falafel, plus it’s so easy to make that even my boyfriend can handle it…

Makes 12/Takes 20

Ingredients
150g of drained chick peas
150g of peeled and grated beetroot
2 tbsp buckwheat flour
1 clove of diced garlic
1 tsp cumin
1 tsp paprika
1 small red deseeded chilli, finely chopped
1 fresh squeeze of lemon juice
40g of chopped fresh coriander
1 tsp bicarbonate of soda
(This is really important,as without it the falafel will be very heavy!)
1 tbsp coconut oil

Method
I said this recipe was quick and easy, so here it is! Mix the dry ingredients together in a bowl. Pop the chickpeas into a food processor and blend for a minute, leaving the mixture a slightly chunky texture. Add the beetroot, chilli and garlic, and then slowly add the dry ingredients until the mixture forms a sticky dough. Roll the mixture into 12 small balls ready to fry. Heat the coconut in a small pan, place the falafel balls into the pan and press on them lightly to make a rough disc shape. Once the first side is crispy and a light brown colour, flip and cook the other side until done. Place the cooked falafel onto a sheet of kitchen roll to soak up the excess oil, and they’re ready for you to tuck in!

I taste-tested these alongside a spring onion and courgetti salad, with some minty coconut yoghurt – delicious!

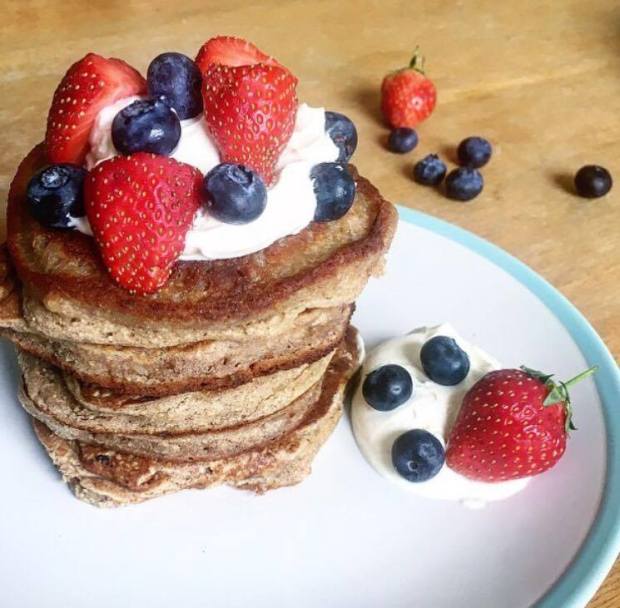
Mr Bennett’s Favourite Glowy Breakfast Pancakes

Pancakes are our favorite indulgent Sunday breakfast, and it’s fair to say we’ve had our fair share of disasters on our way to finding the perfect healthy recipe. We’d tried everything, coconut flour, buckwheat flour, we’ve tried almond milk, and coconut milk. Nothing quite hit that satisfying pancake spot,and honestly, coconut flour pancakes were not our finest moment…

Typically, it had to be a morning where my boyfriend wasn’t around, that I had some time to myself and by sheer fluke managed to whip up these beauties. The recipe I use here does include eggs, but if you’re aiming for a fully vegan version you could easily swap one egg, for one flaxseed egg*  without changing the flavour too much, or simply leave them out altogether.

Makes 12/Takes 20

Ingredients
200g of gluten free oats
2  small over ripe bananas
2 eggs, beaten
100ml almond milk
1 tsp vanilla essence
1/2 tsp of bicarbonate of soda
1 tbsp coconut oil

Coconut yoghurt, fresh berries and maple syrup to serve

Method
Put the oats into your food processor, blend until a rough flour is formed and pop into a large mixing bowl with the bicarbonate of soda. Slowly mix the two eggs into the oat flour. Mash the bananas thoroughly using the back of a fork and stir them into the mixture (it’s important that they are really overripe here so that they mix thoroughly into the batter.) Add the almond milk at small intervals and whisk until a lovely thick, smooth batter is formed, then drop in the vanilla essence. You can add more or less to your own taste, depending on personal preference – I like them super ‘vanilla-ry’! Heat the coconut oil in a pan and pour in the mixture until you have a pancake about 12cm across and 1cm thick. Cook until the bottom is crispy and brown, flip, and do the same with the other side. Continue this way until all of the batter is cooked. I like to keep my pancakes on a plate in the bottom of the oven whilst I’m frying up all the batter, so that I have a whole stack of hot pancakes to serve!

Garnish with coconut yoghurt (like Coyo, or Coconut Collaborative) fresh berries, and then drizzle with lashings of maple syrup. Heaven!

pancakes-1

*(1 tbsp ground flaxseed and 3 tbsp water mixed together and left in the fridge to set for 15 minutes)

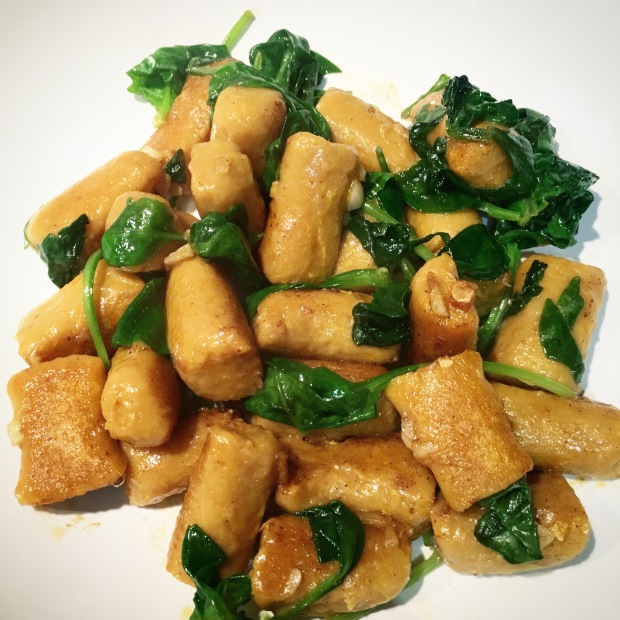
Sweet Potato Gnocchi – It’s a revelation!

I’m crazy about gnocchi. My boyfriend makes a fantastic dinner of gnocchi with sausage ragu, it always feels like such a treat when he cooks it for me, and not just because I don’t have to do any of the work! I had been struggling to find a decent gluten-free gnocchi that I didn’t have to spend a fortune on, and so this recipe was a revelation. It’s much easier to make than you would initially think and it tastes just that little bit more special than the usual white potato version. I usually like to serve my gnocchi with some sort of tomato based sauce, but this recipe is just as delicious on its own…


Serves 2/Takes 30

Ingredients
250g mashed sweet potato
90g buckwheat flour
40g ground arrowroot
1 tsp ground paprika
1 pinch of salt
1 red onion diced
1 tbsp coconut oil
4 cloves of garlic diced
1 handful of baby spinach

Method

Peel and roughly chop two medium sweet potatoes and boil them in a pan of hot water until soft enough to mash. Mix the flour, arrowroot powder, paprika and salt together and set aside. Pop the sweet potato mash into a bowl and add the dry mixture in small intervals. You’ll have to get a bit messy here – knead it all together until a nice soft dough forms. (If the mixture is too wet add a little more buckwheat flour until it firms up.) Divide the dough into six portions.

Sprinkle a little buckwheat onto a clean surface and using your hands, roll each of the six portions into a long sausage shape. Cut these into little rectangles using a sharp knife, and your gnocchi is ready to cook!

Put a pan of salted water on to boil. Whilst you are waiting, heat the coconut oil in a small pan, then add the garlic and onions. Once the water is boiling, reduce the heat slightly and gently drop the gnocchi  into the pan. This will only take a 4-5 minutes to cook so keep a close eye on them! Drain the gnocchi thoroughly and add to the pan with the garlic and onions. Once the gnocchi has started to crisp up slightly, stir in the spinach and  – voila!

img_2299

The BEST Raw Millionaire Shortbread!

This one is my go to recipe for when I’m craving really sweet naughty things! I came across this perfect recipe completely by accident one day, when I needed something  to go with my afternoon cup of tea, and I haven’t looked back since. Unlike other similar millionaire recipes I had tried before, this one is quick, uses easy to find ingredients which won’t break the bank, and tastes DIVINE.

Once this is made, it will easily keep in box in your fridge for a week or two, but I like to freeze mine, so that I’ve always got some to hand to have with my tea!


Makes 16/Takes 40

Ingredients

For the base
125g raw oats
100g ground almonds
1 tbsp. coconut oil
1 tbsp honey
1/2 tbsp. vanilla essence

For the caramel layer
250g pitted dates
1 tbsp. honey
1/2 tbsp. vanilla essence

For the chocolate topping
200g of vegan dark chocolate (try OMBAR it’s amazing) OR
200g of 70% cocoa dark chocolate

Method
Line a 20cm x 20cm tin with greaseproof paper. Blend the oats using a food processor until they make a rough flour. Add the rest of the base ingredients, mix until you have a sticky dough and then press the mixture into the tin. Pop the tin into the freezer for five minutes whilst you are making the next layer.

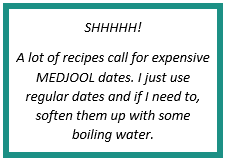
For the gooey caramel layer, simply put the dates, honey and vanilla essence into your food processor and blitz until the mixture has a smooth consistency. This will take a good couple of minutes, but be patient, it’s worth the wait! Whilst you’re waiting, put a small saucepan of water on to boil – you’ll need it to melt the chocolate with in the next step.top-tip

Now spread the caramel mixture on top of the biscuit base using a spoon. Try not to eat too much of it straight from the bowl (!)…and again pop the tin into the freezer for five minutes while you melt the chocolate.

Break the chocolate of your choice into small chunks and put them in a glass bowl. Sit the glass bowl over the pan of gently boiling water and stir the chocolate until it is fully melted. Pour the chocolate over the top of the caramel layer and smooth out with a spatula or knife. For the last time, cover, and pop the tin into to freezer for 15-20minutes until set.

Once set, cut into sixteen bite sized chunks, boil up a cup of your favourite herbal tea and tuck in!


If I’d have known it was this much fun, I’d have been doing it all along….

Weight

It’s a work in progress…

My name is Julianne. I used to be overweight and miserable.

Then, one particulary hungover Friday morning last summer I decided enough was enough. I was soon to be on the downhill slope towards the big 3-0 and it was time I got my act together.

I stopped smoking. I stopped drinking excessively. I started to pay attention to the food I was putting into my body, and I decided to start getting my moneys worth out of the expensive gym subscription I’d had for the last year.

I’ve been meaning to do this for a while now. I found a lot of people I was chatting to about my weight loss and cooking asked me for recipes and tips I used along the way. ‘Start a blog,’ they said, ‘It’s easy everyone’s blogging these days.’ They might be, but time is precious and since I set this account up a year ago (yes really), I’ve been far too busy cooking up delicious healthy treats to sit down and type it all out.

Today I’ve finally let myself stop for an hour or two, to find time. And here it is. A little collection of recipes and notes on my journey to a happier healthier me.

Raw Sticky Toffee Pudding Balls!

I found these little beauties hiding at the back of my fridge this morning, and my day was made! A lot of the energy or protein ball recipes  I’d come across in the past had some sort of nut butter as the main ingredient, which I think is delcious, but my boyfriend absolutely does not. (I know, I can’t get my head around it either.)

So whilst trying to keep him on the healthy band wagon with me, I discovered this recipe. These are so simple to make, ridiculously sticky and sweet, and they keep in the fridge for about two weeks, or the freezer for longer if you want.


Makes 18/Takes 30

Ingredients

50g of raisins
50g of dried prunes
200g of dates
2 tsp of raw cacao + extra for dusting
1 tbsp coconut oil
1/4 tsp of ginger
1/4 tsp cinnamon
1 tsp vanilla extract

Method


A nice eay one to get started with! The fruit in this recipe needs to be really moist to get the amazingly sticky texture, so if the dates, prunes or raisins are looking a little dry, start by soaking them in a little hot water for 5 minutes. Good. Food proccessor ready? Chuck everything into your food processor  or blender until the ingredients are thoroughly combined to make a nice sticky mixture. Seperate into 18 balls and roll in the left over cacao, pop into the freezer to set for 20 minutes and then pop into your mouth!